
Contact Form 7 integration
How to use stripe-express elements in Contact form 7.
Important Update: Migrate to PayAddons (Recommendation)
We've moved all payment functionality to our dedicated plugin that offers a comprehensive suite of payment features, including:
- One-time payments (stripe hosted checkout redirection)
- Subscription payments
- Secure credit card field
- Mutiple payment methods field
- And much more
Get the plugin at payaddons.com for free: Accept Stripe for Contact Form 7
If you still want to use the CF7 feature with stripe express, please continue to read. But we strongly recommend you to use our dedicated one.
why do we need some customized fields for payment?
For all the build-in elements, they are fixed once it is created, including the fields like name, email, and phone. However, people always want to attach more fields or information along with the payment, no matter if these fields are static or collected by customers.
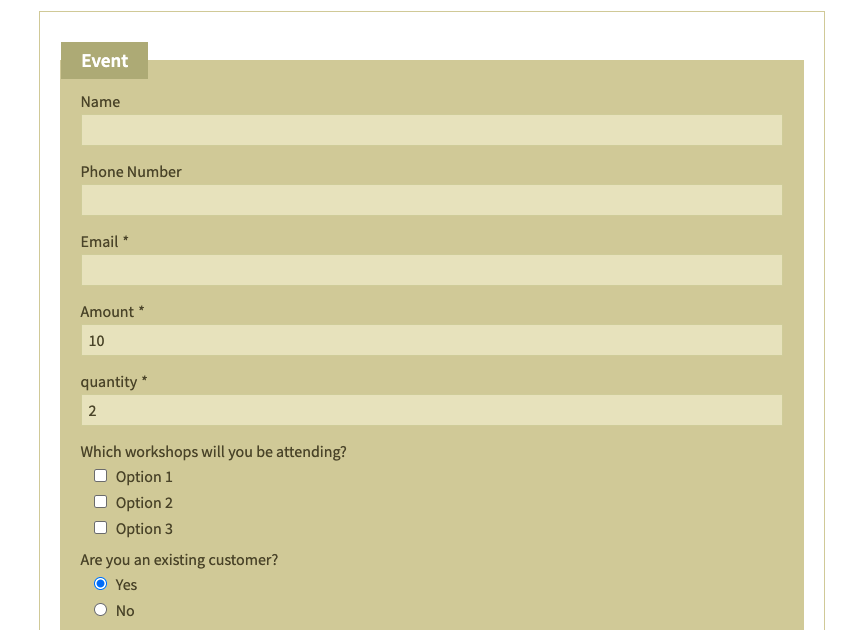
For example, you have a sport event registration form that includes events detail, athletes' information, registration fees, tickets purchase, customer questions, and so forth...
What you expect is as long as your customer registers, you can not only collect the registration information but also let a customer pay these fees. At the same time, you can even send a customer confirmation email once it's done. Sounds good?
Why choose Contact Form 7?
Contact Form 7, As a top 1 form builder plugin with over 5 million installations, we do like Contact Form 7, not because of its popular, but simple, flexible, etc...
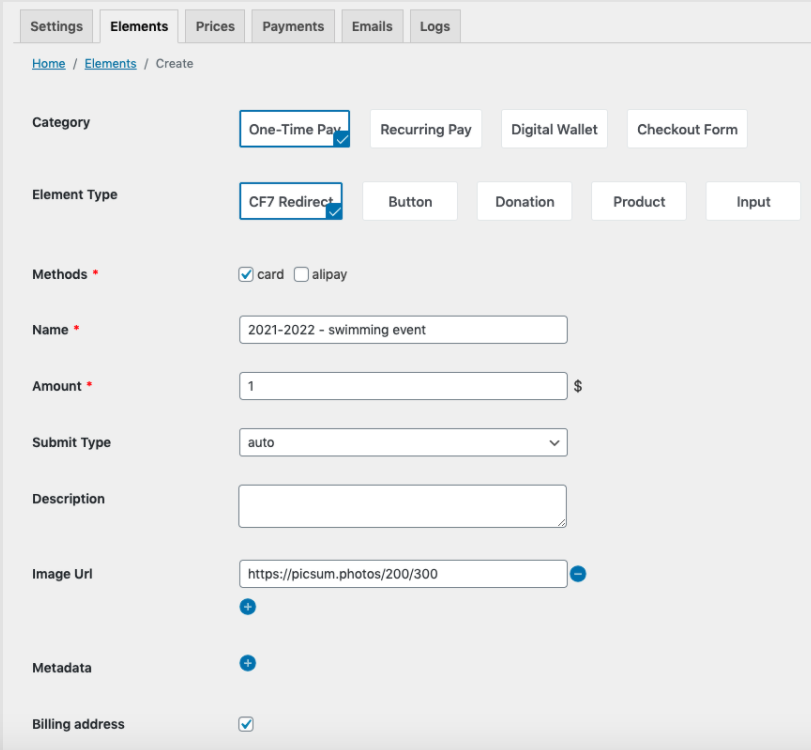
Create an CF7 Redirect Element button
This type button will eventually redirect to the stripe-hosted checkout page.
Go to the stripe-express plugin and choose the CF7 Redirect type to create a payment button.
Create CF7 form
After installing the CF7 plugin, there is a default form, so we use it to do our guide. Click the form to edit it.
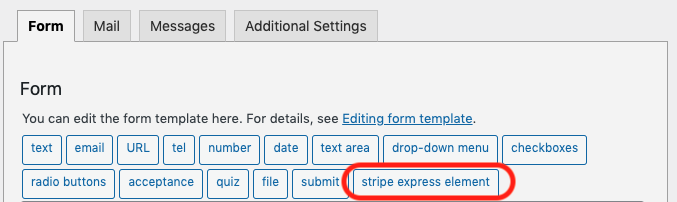
if you have installed the
stripe-expressplugin, you should see there is a new tag calledstripe express element
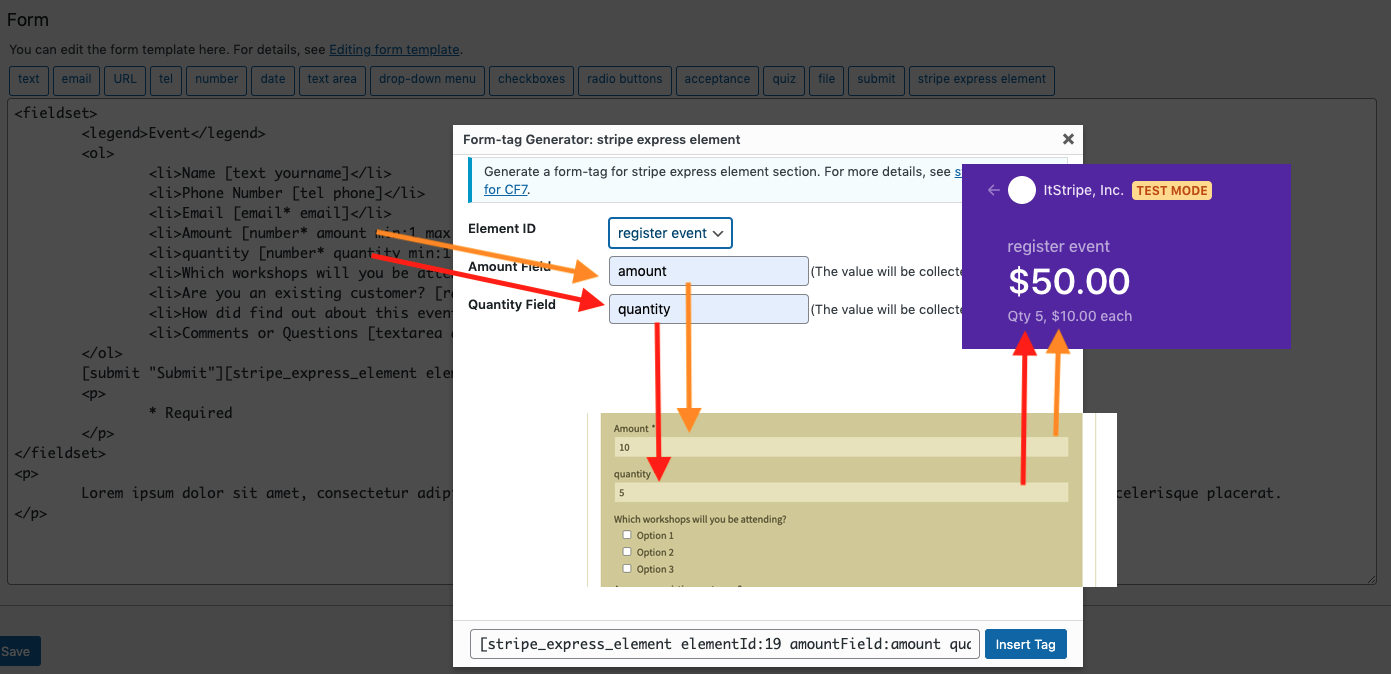
Then click the stripe express element tag to insert, and a configuration dialog will be shown. The key is we have to select an element that is required, if there is no one list here, then we have to create them first in stripe-express.
In this dialog, there are three fields we can configure:
- Element ID: it's required to select one element created from our
stripe-expressplugin, if not, please go to the previous step to create one. - Amount field(optional): we can specify a field name from the current cf7 fields. If leave it empty, then the payment
amountwill be the same as the value when you create the element button. But if specified, the paymentamountwill be used this field value(might be from customer typing or a hidden fixed field) - Quantity field(optional): Similar to the amount field, the value will be used to calculate the total payment amount which is equal to
amount*quantity.
don't worry this inserted tag [stripeexpresselement], this will be invisible for end-users and just used to link to our plugin's element button.
You can also manually type tag code instead of clicking the tag to insert it.
<label> Your name
    [text* your-name] </label>

<label> Your email
    [email* your-email] </label>

<label> Subject
    [text* your-subject] </label>

[stripe_express_element elementId:19]
[submit "Submit & Pay"]
Now save it and you are done!
 ## Test your form
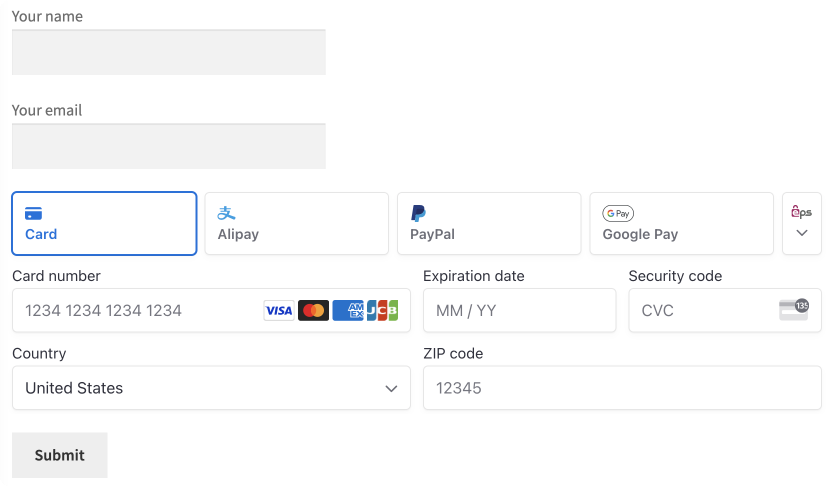
In any of your pages or posts, insert your contact form 7 which you just created and you should see below!
## Test your form
In any of your pages or posts, insert your contact form 7 which you just created and you should see below!
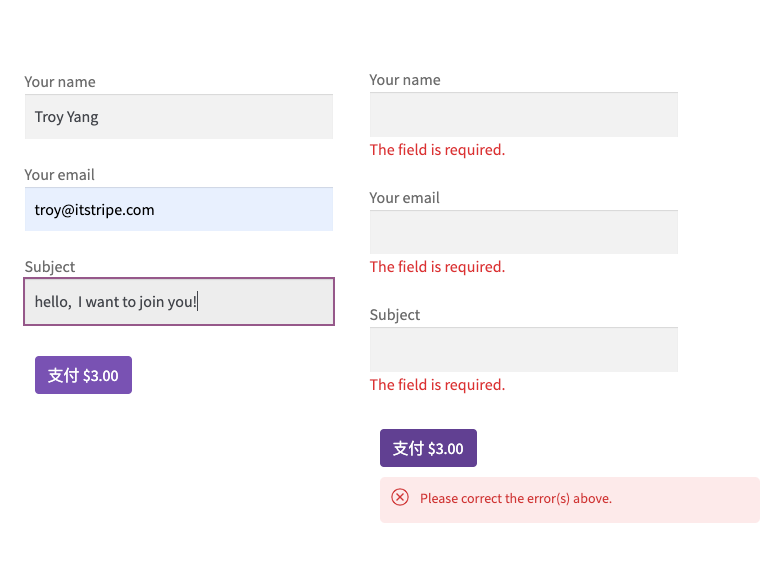
The validation is coming from contact form 7 self and if you fill all required values, click the pay button, contact form 7 will send your customer an email if you config the email during your creating form. Once the sending success(you can also turn the send email off), your customer will be redirected to the stripe checkout page and this behavior is the same as a standalone one-time button does.
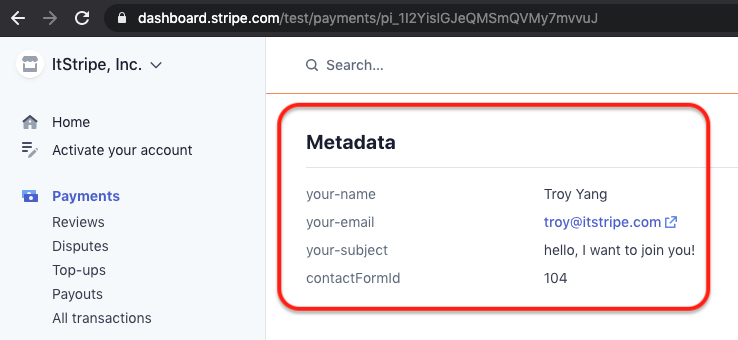
Check the fields information
Three options you can touch these data:
- The form fields are sent to your customer by email already.
- Contact form 7 recommends using Flamingo – With Flamingo, you can save submitted messages via contact forms in the database.
- Go to stripe dashboard => find the payment => check its metadata
Tips: you can also attach any read-only or hidden fields to help you to track payment like below contactFormId.
Submission flow
Continue to above, All of our widgets support inserting into any form from CF7 as its submission button. When customers submit the form, the CF7 original sending email submission does its own job(you can also turn it off), once success, the payment workflow will be triggered then. After the payment, you should see these field's information in your payment details' metadata, never miss them.
Payment workflow might be different based on which widget you are using, if one-time payment or Alipay, your customer will be redirected to the stripe checkout page. Otherwise, your customer will be always on the current page.