Woocommerce Stripe Checkout Page Integration
How to redirect to stripe checkout page in woocommerce.
Important Update: Migrate to PayAddons (Recommendation)
We've moved all payment functionality to our dedicated plugin that offers a comprehensive suite of payment features, including:
- One-time payments (stripe hosted checkout redirection)
- Subscription payments
- Secure credit card field
- Mutiple payment methods field
- Express Checkout
- PayPal
- And much more
Get the plugin at payaddons.com for free: Stripe Payment For WooCommerce
Prerequisites
- A premium license
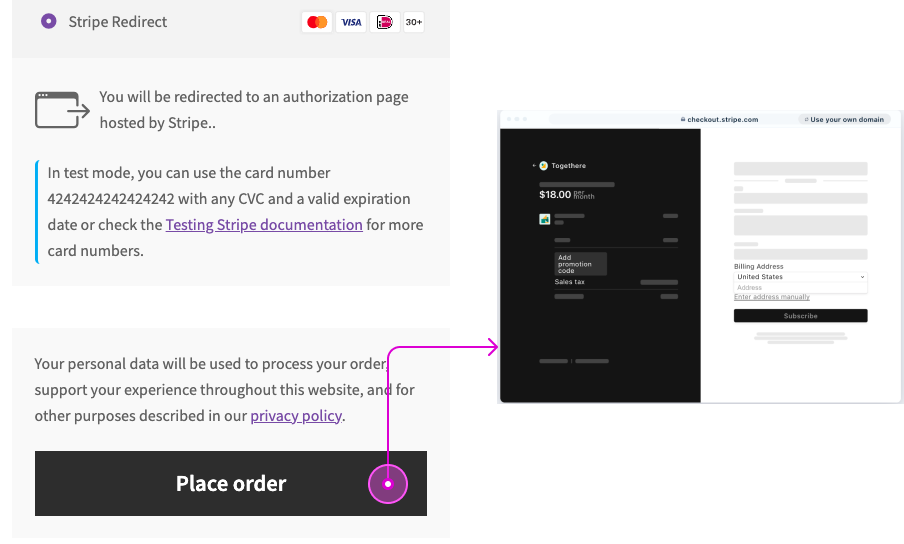
Why need to redirect to Stripe hosted checkout page during checkout?
- Trust - More trustworthy to customers when being redirected to stripe own checkout page than giving their credit card details.
- Security - Stripe Checkout is PCI compliant out of the box and manages sensitive card data securely via Stripe Elements. This removes the PCI burden from your servers.
- Conversion - Stripe Checkout is designed to convert with best practices for checkout flow, reducing friction and cart abandonment.
- Global Support - Works worldwide with built-in support for local payment methods, currencies and languages.
Stripe setup
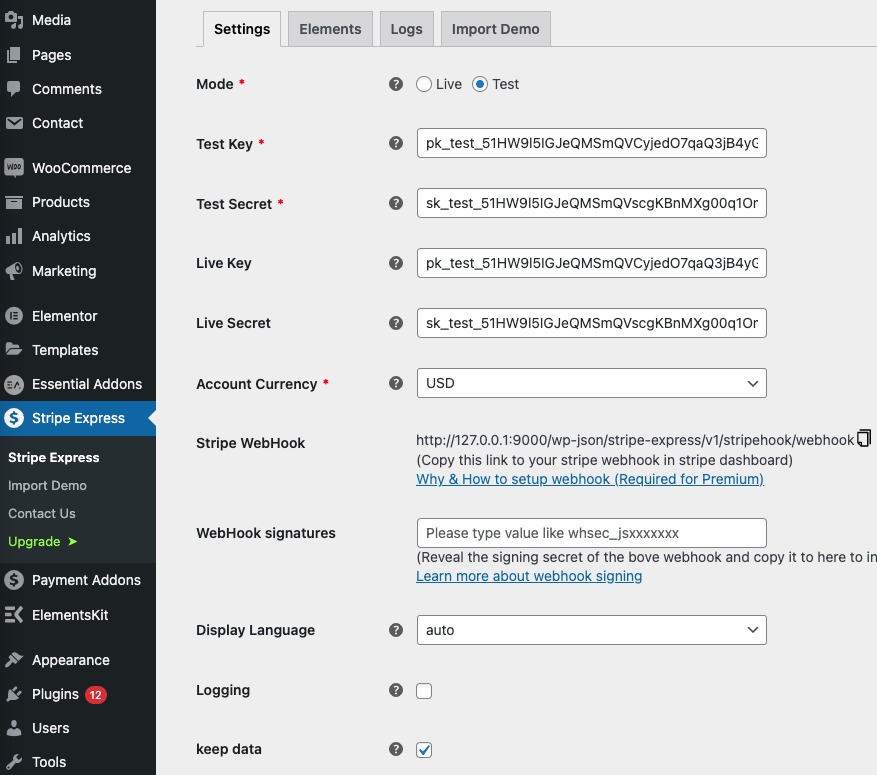
First of all, we need to set up the stripe API keys in Stripe Express -> Settings Tab
You don't need to create an Element that our plugin mainly uses because Woocommerce has its own workflow, and it's challenging to leverage our built-in elements.
Woocommerce setup
- Make sure the woocommerce addon for stripe express is installed.
- Go to Woocommerce -> Settings -> Payments setting and enable Stripe Express payment method.

- Configurate the payment elements settings, such as Supported Payment Methods.
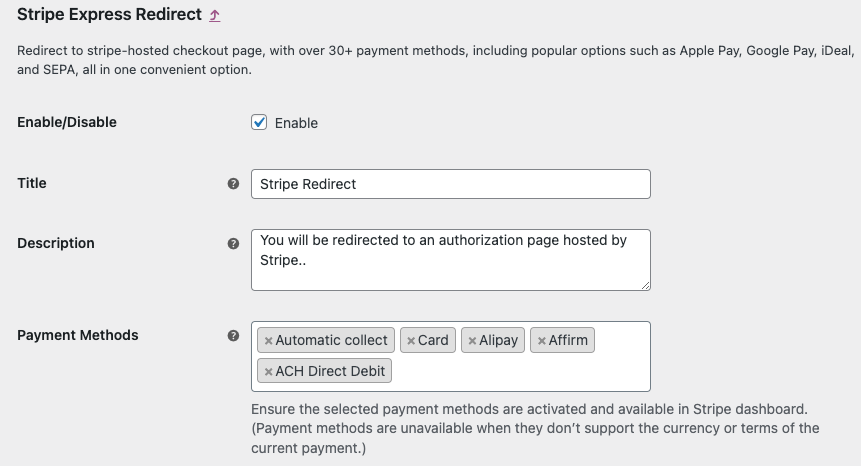
Payment methods
Normally, we supported all 40+ payment methods Stripe provided, however, you need to ensure the selected payment methods are activated and available in Stripe dashboard and also, Payment methods are unavailable when they don’t support the currency or terms of the current payment.
Automatic collect This is the default value which means Stripe will find out the best suitable payment methods from your supported payment methods to display.
If you don't auto collect payment methods, you can select the supported payment methods based on the currency.
Webhook
Webhooks are used by Stripe to communicate with your site. It provides information such as the status of the payment, and is used to update the order based on certain events from Stripe’s side of things.
In the settings, you’ll find a webhook endpoint URL ready for you to copy and paste into your Stripe dashboard:

Next, in your Stripe Dashboard go to Developers » Webhooks and select Add endpoint (with “Test mode” enabled or disabled, depending on which mode is being configured). Paste the webhook endpoint URL you copied earlier into the Endpoint URL field, and select the following * events (at minimum):
- charge.succeeded
- charge.failed
- charge.captured
- charge.dispute.created
- charge.dispute.closed
- charge.refunded
- payment_intent.succeeded
- paymentintent.paymentfailed
- paymentintent.amountcapturable_updated
- paymentintent.requiresaction
Enable Webhook signatures (Optional)
Generating a signature for the webhook can greatly protect your endpoint from being abused by external parties.
- In your Stripe dashboard, go to the webhook settings and click the
Signing secretbutton to generate a signature.
Generate signature:


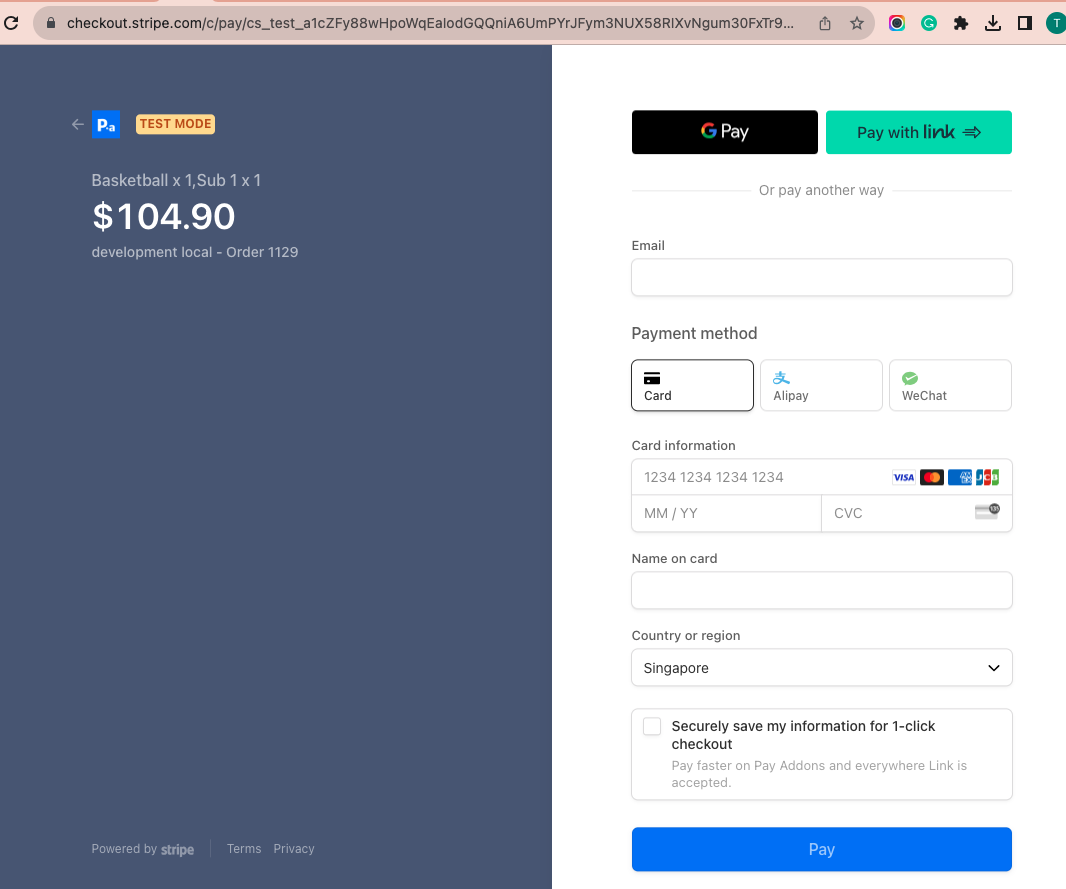
Test
Once everything above done, we can test the checkout page with your woocommerce site. It would be similar like this: