
Setup Setting
It's a complete guide to show the configurations.
In order to proceed with any further processes, we need to successfully configure both the plugin settings and Stripe settings.
Stripe setting
Stripe has two modes: Test and Live. For test purposes, the following guide uses the test mode.
- Obtaining API key (Publishable key and Secret key)
Go to https://dashboard.stripe.com/ with your stripe account, then click Developer -> API keys:
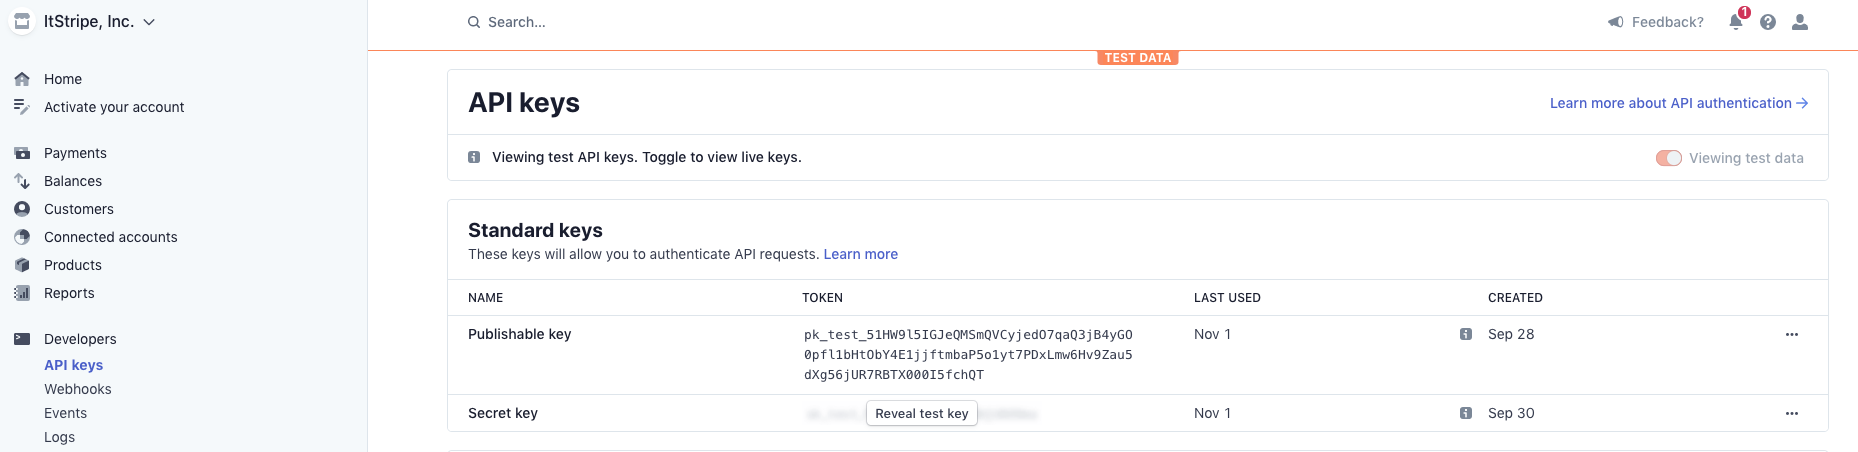
Then temporarily copy the Publishable key and Secret key (make sure to clear them after use).
- Enabling Stripe Checkout integration (well-known Stripe self-hosting checkout page for One-Time and Recurring payments)
As all of our one-time elements use this Checkout integration page, we need to enable it.
Go to https://dashboard.stripe.com/settings/checkout and enable it (you can specify your white list domains)

Stripe WebHook setting
Note: if you are only using a one-time button, you can ignore this part Learn how to setting up webhook
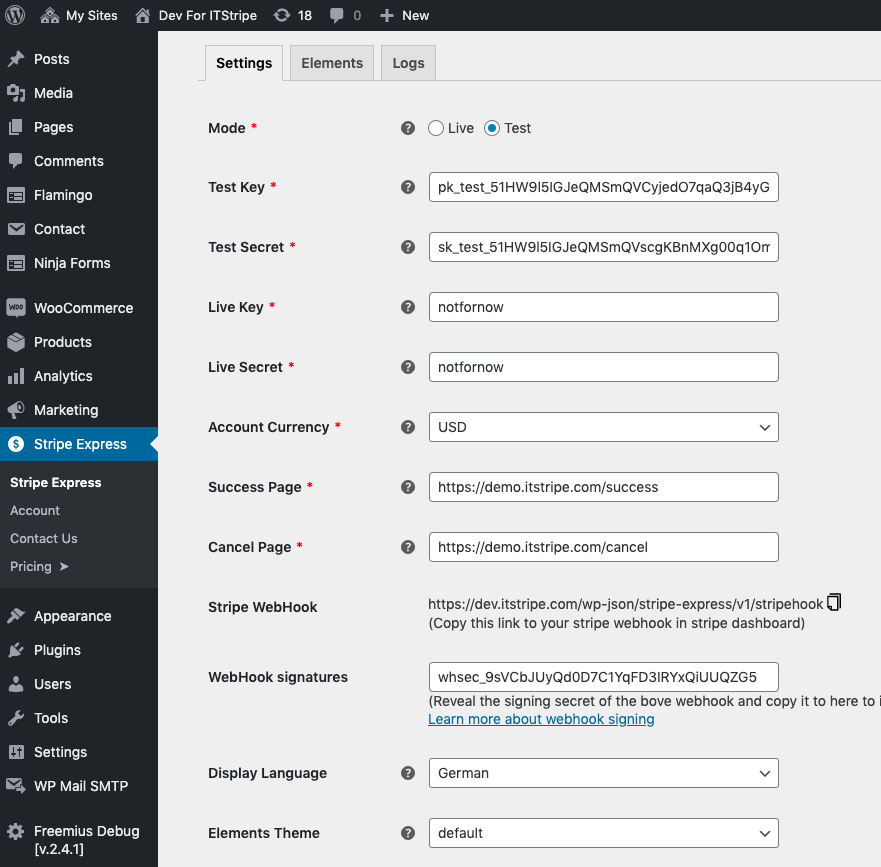
Plugin setting
You have now completed the above Stripe-related configurations. We still need to set some necessary fields:
- Account Currency
Specify the correct currency that matches your Stripe account. It will be used as your store's pricing currency. - Success Url
You need to create this page if you don't have one, as this page will be redirected to after the payment is successfully processed from the checkout platform, such as the Stripe checkout page or the Alipay checkout page.Learn how to create confirmation page - Cancel Url
Similar to the Success URL, you should create one by yourself to show your customers that the payment has failed or been canceled for any reason. - Enable debug
As the name suggests, if enabled, all necessary information will be logged in your system, and you should see all of them in the Logs tab. We recommend enabling it in case of any issues, so we can assist you. - Keep data If checked, all data generated from this plugin will be kept until you specify to delete them. This is usually useful when you remove the plugin and then reinstall it.