
Configure Confirmation Page
A guide to show how to create a confirmation page with payment information
Configure Confirmation Page
The confirmation page is required for redirecting customers to a success or failure page after they complete the Stripe checkout process. Typically, you can specify any page on your website, such as a static page with a simple Thank You message.
However, if you want to display more detailed information such as payment details for the customer, you can use our built-in shortcodes.
Built-in short codes
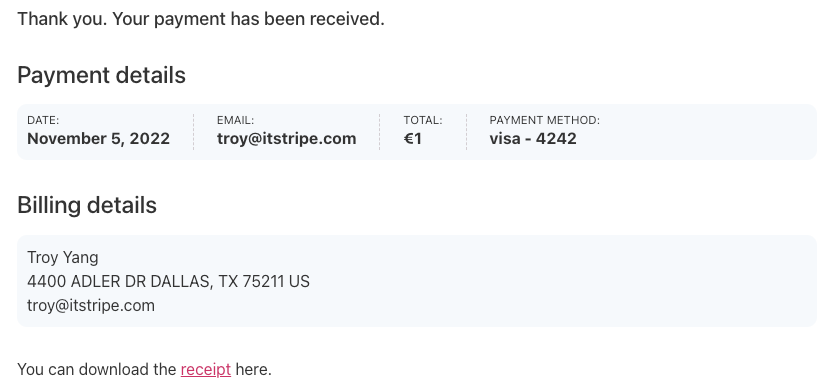
The easiest way to create a confirmation page is to use the built-in shortcode [stripe-express-receipt]. This will display several sections with useful information such as payment details and billing information. By default, the shortcode will display all sections, but you can also control which sections are displayed and which are not.
[stripe-express-receipt] # all sections will display
[stripe-express-receipt hidden="true"] # hide all sections
[stripe-express-receipt hide-thank-you="true"] # hide thank you
[stripe-express-receipt hide-payment-detail="true"] # hide payment information
[stripe-express-receipt hide-billing-detail="true"] # hide billing information
[stripe-express-receipt hide-receipt-link="true"] # hide receipt link
or you can hide more sections together:
[stripe-express-receipt hide-receipt-link="true" hide-billing-detail="true"]Use Custom white-label Tags
The shortcode is required too, and we can hide the built-in sections.
[stripe-express-receipt hidden="true"]
If you don't like the above sections, you can feel free to design your theme confirmation page with blow tags in editor.For instance:
Dear {customer.name},

Thanks for your payment, we just received {amount_currency} for the item {description}.

The shipping address would be:

{billing_detail.address.line1} {billing_detail.address.line2}
{billing_detail.address.city}, {billing_detail.address.state}, {billing_detail.address.postal_code}


Thanks for shipping with us!
The available tags list below:
{description}
{amount}
{currency}
{date}
{amount_currency}
{customer.email}
{customer.name}
{customer.phone}}
{customer.address.country}
{customer.address.state}
{customer.address.city}
{customer.address.line1}
{customer.address.line2}
{customer.address.postal_code}
{billing_detail.email}
{billing_detail.name}
{billing_detail.phone}
{billing_detail.address.country}
{billing_detail.address.state}
{billing_detail.address.city}
{billing_detail.address.line1}
{billing_detail.address.line2}
{billing_detail.address.postal_code}
{payment_method}
{payment_method.card.brand}
{payment_method.card.last4}
{receipt.url}
The white-label can be put any place on your page and they will be replaced after the page is loaded.